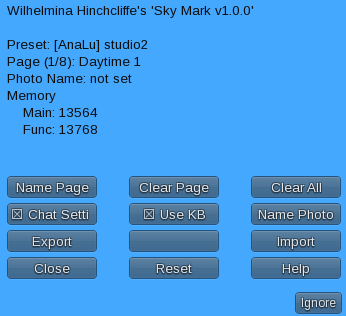
Now we’re getting into the clever parts that are designed to really simplify the SL photographer’s life.
Well THIS SL photographer’s life at any rate 🙂

Export – The Sky Mark can store up to 64 Windlight presets at a time. “But Mina” you wail, “what if I have more than 64 presets that I like? What will I do? Where will I go” – Well you’ll ask that if you’re Scarlett O’Hara perhaps. Regardless of who you are I’ll reply not with a rakish “Frankly my dear, I don’t give a damn”, but instead with the Export button. If you click it you’ll get a screen full of vaguely gibberish-y information which represents a formatted dump of all of your presets. It will look a little like this except way longer:
Sky Mark: Copy the text between the ===== lines into a note card and give it a descriptive name. Names should be 20 characters or less for best results:
=====
[08:09]
{pageindex=0}
{pagename=Daytime 1}
{preset0=AnaLutetia - AvatarOpt}
{preset1=Phototools- Dream Book Light 03}
{preset2=Phototools- July Light 01}
{preset3=[TOR] MIDDAY - Cheery cyan}
{preset4=[TOR] MIDDAY - Maldives}
{preset5=[TOR] MIDDAY - My noon}
{preset6=[TOR] MIDDAY - Precision blue}
{preset7=AvatarOpt}

[08:09]
{pageindex=1}
{pagename=Daytime 2}
{preset0=[TOR] MIDDAY - Rebranded skies}
{preset1=(SS) Atmos 12:00 1}
{preset2=Coastal Afternoon}
{preset3=Places Las Legunas}
{preset4=[AnaLu] default1}
{preset5=[EUPHORIA] that day}
{preset6=AA Cozy Interior}
{preset7=}
You can copy this gibberish into a note card, give that note card a meaningful name – 20 characters or less to avoid confusion, and then place it in the Sky Mark HUD, then you can…
Import – Click this button to display the Exported notecards that are currently in your Sky Mark . Pick one and a moment later all of the presets are loaded and ready for your use.
Just one more page of settings – remember I had to write all these scripts THEN type the instructions so, yeah, I know how long it is. Next up Settings Part 4.