You know sometimes I just have no idea where an idea comes from. Case in point the Drying Rack which is my gift for the 2016 Dirty Little Secrets Hunt which is running – or if you’re reading this from the future, ran – from 25 Oct through 25 Nov. I’m certain SOMETHING put it into my head, but I haven’t a clue what 🙂
Anyway, moving on, the Drying Rack is my latest Pipes & Clamps simple bondage device.
Using The Drying Rack
Like all of my Pipes & Clamps devices the Drying Rack uses my easy to operate RLV system, and my damn clever if I do say so myself adjustment system. If you’ve used any of my other devices you pretty much know exactly how to use this one, but just in case…
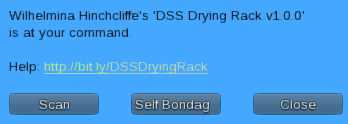
Clicking any of the vertical bars – up and down for those of you like me who had to Google “vertical” – will bring up a menu that looks something like this:
If this is your Drying Rack you’ll also see a [Settings] button but I’ll save that for later. For now you’ve got these options:
| Scans the surrounding area for potential captives – that is anyone with an active relay except the person clicking the scan button. For that we have… | |
|
Clicking this will cause the Drying Rack to try and grab you. If it’s able to do so it will set a random timer and hold you in its not so gentle grasp till then. And no, of course you can’t see the timer 🙂 |
|
| Exactly what it says. Clicking this closes the menu and releases the script resources in use. |
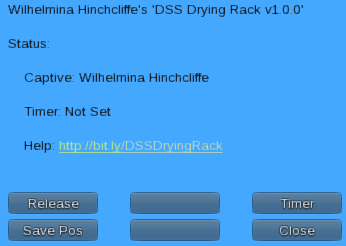
Once you’ve got a captive the menu options change to something like this:
Adjusting the Drying Rack
Here’s where I traditionally point out that 5’9″ – or 175 cm for the metricly inclined – is not short anywhere else in the world but SL, but since the Drying Rack doesn’t exist anywhere else in the world except SL, and since I build everything around myself, and since my SL self is 5’9″, this is where I explain how to use my resizing system.
Luckily it’s WAY simpler than that last sentence 🙂
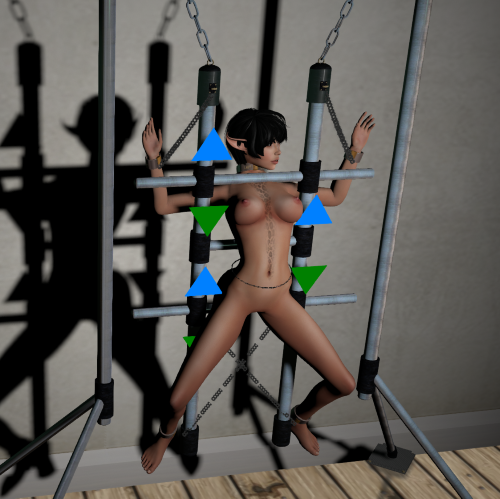
Click on any of the horizontal – again, according to Google that’s the ones going left to right or right to left – pipes and you’ll see several pairs of arrows appear: 
Clicking a blue arrow will raise that bar, clicking a green arrow will lower it.
See? I told you it was simple 🙂
Settings
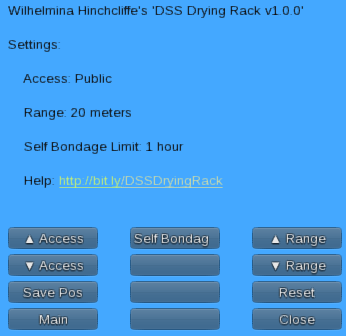
As promised, here’s what happens if you click the [Settings] button: