Time for new toys!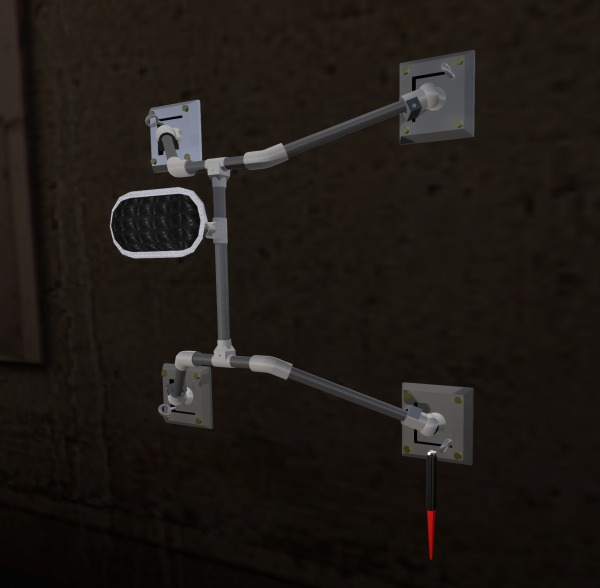
Actually this was my holiday gift to my customers – that’s right I’m not above bribery, keep that in mind next year 🙂
Today’s bit of diabolicalness is the Wall Mount. It’s a pipe-y bit of evil with a shocking secret 🙂
Okay the secret is that it’s got one of my clever little animated shock wands attached to it. Do I suck at keeping secrets or what?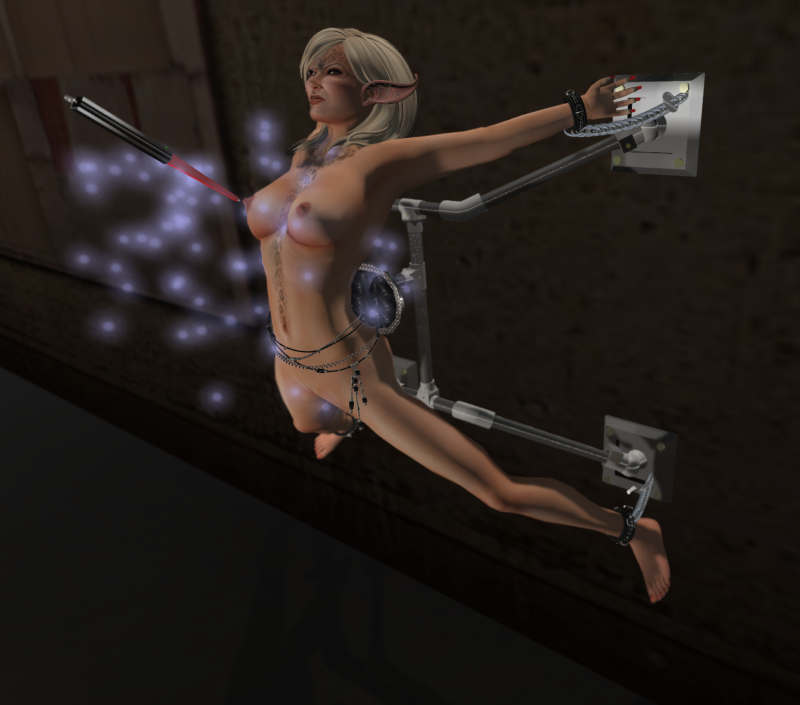
As you might guess the Wall Mount is designed to – well, be mounted on your wall, but it works as well on the floor. Like all of my RLV toys the menu is designed for simplicity and not to launch a pre-emptive nuclear strike against Mars 🙂
If you’re the owner of this particular Wall Mount you’ll get a menu like this when you click on it:
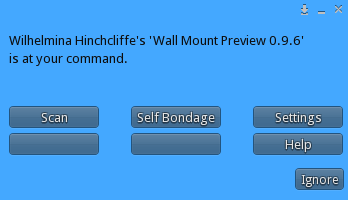
If you’re not the owner, you’ll get the same menu but with no Settings button. Since there are probably going to be more non-owners than owners I’ll cover the operating parts first then do a section on the settings at the end of this page.
So, two options – three if you count Help. The Self Bondage button will try to grab the person doing the button clicking – that’d be you – and throw them on the Wall Mount. Assuming that it’s successful it will then set a random release timer and no it won’t tell you how long you’ve got to wait to get loose.
The Scan button looks for people in the area with active RLV relays and assuming that it finds some it will give you a list of choices. Like picking a lobster from the tank at Red Lobster 🙂
Pick your victim and the Wall Mount will grab her or him and truss them up nicely. The Wall Mount uses LockMeister chains so it should work with any restraint set. In my bid not to fill people’s inventory with a set of too small and shoddy looking cuffs, I haven’t included my own set. If you do need cuffs let me suggest Open Collars 8 Cuff Set with is free and functional.
Once your captive is mounted you can release them or set a timer for a delayed release. See? I told you it was simple 🙂
You can also have evil – nay… Diabolical fun with them. Simply click anywhere on your victim’s body and hold the mouse button down. The shock wand will spring to life and follow you as your mouse across your helpless captive’s form. When you release the mouse button… ZAP! If you click and hold again you can keep moving the wand over them. If you wait a few seconds it will return to its hanger automatically.
And that’s pretty much it for using the Wall Mount.
If you happen to be stuck on a wall mount there’s not too much you can do, but if the fit isn’t exactly perfect you can move yourself up and down by pressing the up and down arrows. You can move the back brace in and out with the left and right arrows.
Say remember when I promised to explain about the Settings button? Guess what time it is kids?
Clicking the Settings button will trigger a menu that should look very much like this one: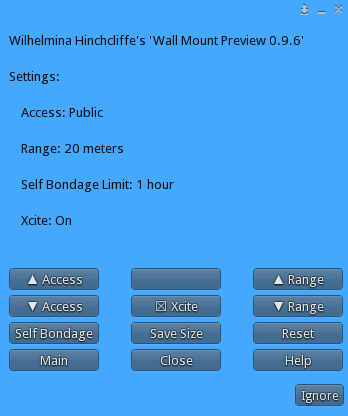
Starting more or less at the top left button we have the Access control buttons. There are three settings – Public, Group Only, and Private. This controls who can access the Wall Mount’s menu. Anyone with RLV and a working relay can be grabbed regardless of the access setting.
Next is Xcite. Well technically next is a blank button but look down a little bit and you’ll see Xcite. The Wall Mount is Xcite enabled meaning that if your victim is likewise Xcite Enabled (wearing their Xcite gear) the Wall Mount will start sending them happy feelings. It specifically targets the Bondage and Electricity fetishes so if you have someone who’s a fan of both you might wind up with a bit of a mess. You can use this button to turn the Xcite system on and off.
Range allows you to set the distance the Wall Mount will look when scanning for potential victims. The minimum is five meters, the maximum 90.
Self Bondage is a little confusing. This lets you set the MAXIMUM amount of time that someone using the Self Bondage button on the main menu will be trapped. Keep in mind that this isn’t the actual amount of time, but just the higest possible.
Save Size lets you set the default size of your Wall Mount. This is handy if the device is in a public space and other people use the adjustment tool to custom fit the Wall Mount to their shape. Clicking this saves the current size, so that clicking the Reset button will return it to this size.
Reset returns the Wall Mount to its last saved size and does a script reset.
And that’s that. Easy peasy, right?
If you have any questions, problems, or simply want to shower me with praise you can send me an IM in SL. You can check out a demo of the Wall Mount in my shop in SL.
Thanks for checking out my gizmos!